In today’s fast-paced world, keeping track of time is not just a necessity but a vital aspect of daily organization and efficiency. A well-set digital clock is crucial in maintaining punctuality—be it for waking up on time, managing appointment schedules, or ensuring timely completion of tasks. Despite the pivotal role they play, many people overlook the simplicity and utility of properly setting up a digital clock. This guide aims to demystify the process, showing you how straightforward it can be to configure your digital clock. Not only will you learn how to accurately set the time and date, but you’ll also discover how to make the most of additional features that can enhance your daily routine. Whether you’re setting up a new device or tweaking an old one, understanding how to properly set your digital clock is a small but powerful step towards optimizing your time management skills.
Unboxing and Initial Setup
Unboxing your new digital clock marks the beginning of better time management. Inside the box, you’ll typically find the clock itself, a user manual, and depending on the model, either a power adapter or a space for batteries. Start by carefully removing the clock and all accompanying materials. Review the user manual for specific instructions related to your model. The initial setup usually involves powering the device—insert the recommended batteries into the compartment, ensuring correct polarity, or connect the clock to a power source using the adapter provided. Some models might also require you to remove a protective film from the display or press a reset button to activate the clock. Once powered, the clock’s display should light up, indicating it is ready to be set. This moment of powering on sets the stage for personalizing your device to match your daily needs.
Understanding Your Digital Clock

Understanding the layout and functionalities of your digital clock is essential for maximizing its use. Commonly, digital clocks are equipped with several key buttons that control all operations: ‘Set’, ‘Mode’, ‘Up’, and ‘Down’. The ‘Set’ button typically initiates the setting process for time, alarms, or other customizable features. ‘Mode’ allows you to switch between different functions such as time display, alarm setting, and sometimes even temperature or humidity readings, depending on the clock’s capabilities.
The ‘Up’ and ‘Down’ buttons increase or decrease values, simplifying the adjustment of the time, setting up Digital Clock alarms, or changing other settings. The display itself clearly shows the time, often in LED or LCD format, and may also provide indicators for AM/PM status, alarm settings, and other active features. By familiarizing yourself with these elements, you can effectively manage and utilize all the functionalities your digital clock offers, ensuring it serves your needs precisely.
Step-by-Step Guide to Setting the Time
Setting the time on your digital clock is a straightforward process that can be quickly mastered with a few simple steps. To begin, press the ‘Set’ or ‘Mode’ button to enter the time set mode; this might sometimes require holding the button for a few seconds depending on your clock model. Once in time set mode, the hour digits typically start blinking, indicating they can be adjusted. Use the ‘Up’ or ‘Down’ buttons to increase or decrease the hour value. Press the ‘Set’ button again to confirm the hour and move on to the minutes. Repeat the process for setting the minutes. If your clock also includes seconds, you might need to press ‘Set’ once more to adjust them similarly.
Finally, if your clock has the option to toggle between AM/PM or a 24-hour format, you will usually find this setting as an option in the same sequence.Confirm all settings by pressing ‘Set’ or ‘Mode’ once more, or let the clock automatically exit the setting mode if designed to do so. This process ensures your clock accurately reflects the current time.
Setting Additional Features

Beyond basic timekeeping, digital clocks often come equipped with a variety of additional features that enhance their functionality. To set alarms, press the ‘Mode’ button until you reach the alarm setting screen; here, you can choose the time for the alarm and often select different tones or radio stations if your clock includes a radio function. Use the ‘Up’ or ‘Down’ buttons to adjust the alarm time and switch between different tones to find one that suits you. For setting the date, continue in the settings menu until you reach the calendar function, where you can set the day, month, and year in a similar manner.
Many digital clocks also offer useful features like temperature displays, which typically do not require manual setting, and timers or countdowns, which users can access and set via the ‘Mode’ button.Additionally, if your clock includes a backlight, you may be able to adjust its brightness or set it to automatically dim during certain hours through a specific menu or button, enhancing visibility according to your needs. Utilizing these features fully can make your digital clock a more valuable tool in your daily routine.
Customizing User Preferences

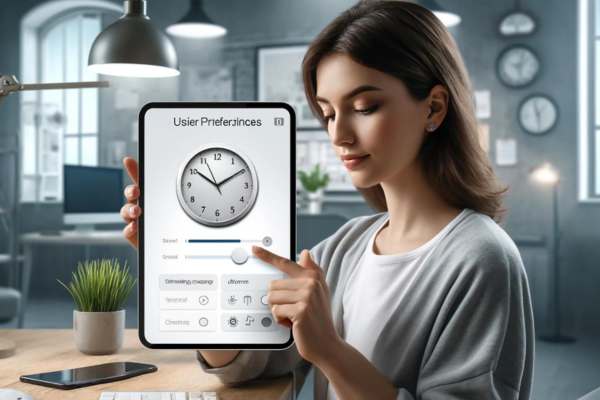
Customizing your digital clock to suit your personal preferences not only enhances your experience but also optimizes the device’s functionality. Start by adjusting the display brightness or contrast to ensure the clock is easy on the eyes, especially in a bedroom or dimly lit area. Access these settings through the ‘Mode’ or ‘Set’ button’s menu. If your clock features connectivity options like Bluetooth or WiFi, set these up by navigating to the network or connections menu. Pair devices or connect to your home network to access online features or synchronize time automatically.
To maximize energy efficiency and extend battery life, reduce screen brightness during nighttime, utilize any available eco-mode settings, and connect the clock to networks or Bluetooth only when necessary. These small adjustments can lead to significant savings and a more tailored use. These small adjustments can lead to significant savings and a more tailored use of your digital clock, making it a seamless addition to your daily life.
Troubleshooting Common Setup Issues

Encountering issues during the setup of your digital clock can be frustrating, but many common problems have straightforward solutions. If the buttons are unresponsive, first ensure adequate power to the clock by checking the freshness and proper installation of the batteries or the secure connection of the power adapter.Dust or debris might also impede button functionality, so gently cleaning around the buttons with a soft, dry cloth can help. For more persistent setup errors or if the clock displays incorrect settings consistently, a reset might be necessary.
To reset most digital clocks, press a specific combination of buttons, often ‘Set’ and ‘Mode’ simultaneously, or use a pointed object to press a small ‘Reset’ button typically located on the back or base of the clock. This action usually restores factory settings, clearing any errors and allowing you to start the setup process anew. Keep your user manual handy as it will provide the most accurate guidance for troubleshooting specific to your model.
Final Thought
In conclusion, properly setting up your digital clock is essential for maximizing its functionality and ensuring it meets your daily needs effectively. By taking the time to understand and configure all available features—from setting the correct time and date to customizing alarms and display preferences—you enhance the utility and efficiency of your device. Remember, your digital clock is more than just a timekeeper; it’s a versatile tool that can improve your daily routines when fully optimized. We encourage you to experiment with the various settings and features your clock offers. Tailor it to your lifestyle and preferences, and don’t hesitate to reset and readjust as your needs evolve. With a well-set clock, you’re not just keeping time; you’re staying ahead of it, making every minute count in your organized and productive life.

