
Wondering “How to repair a wall clock?” and restore its reliable timekeeping? Fixing a wall clock can be a rewarding task that not only saves you money but also preserves the charm of a cherished timepiece. Whether your clock has stopped ticking, the hands are stuck, or it’s just not keeping time accurately, this guide will walk you through the process of diagnosing and repairing common issues. From understanding the basic components and identifying problems to cleaning and adjusting the mechanism, our step-by-step instructions will help you get your wall clock back in perfect working order. Dive in to learn how you can bring your wall clock back to life with simple, effective repairs.
Understanding Wall Clock Components
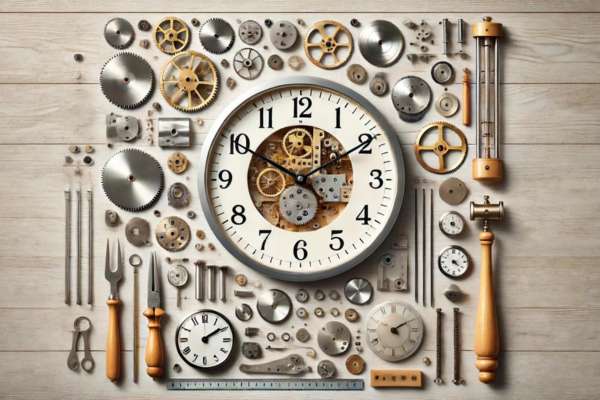
Understanding the basic components of a wall clock is essential for effective repair. The key parts include the movement mechanism, hands, face, and pendulum (if applicable). The movement mechanism is the clock’s heart, driving the hands to keep time. It can be either mechanical or quartz. The hands indicate the time and are often secured by a central pin or nut. The clock face, or dial, displays the numbers and guides the hands’ movement. If your clock has a pendulum, it helps regulate the movement, ensuring accurate timekeeping. Knowing these components helps in diagnosing issues and performing precise repairs, ensuring your wall clock runs smoothly and accurately.
Common Wall Clock Issues

When repairing a wall clock, identifying common issues is the first step. Frequent problems include the clock not ticking, which often points to power issues like dead batteries or disconnected wires. Stuck hands can result from debris or misalignment, causing them to catch on each other or the clock face. Incorrect timekeeping is another common issue, often due to worn-out gears, dirt buildup, or improper calibration. By recognizing these issues, you can diagnose the problem accurately and apply the correct repair methods. Understanding these common wall clock issues ensures you can effectively restore your clock’s functionality, keeping it running smoothly and accurately.
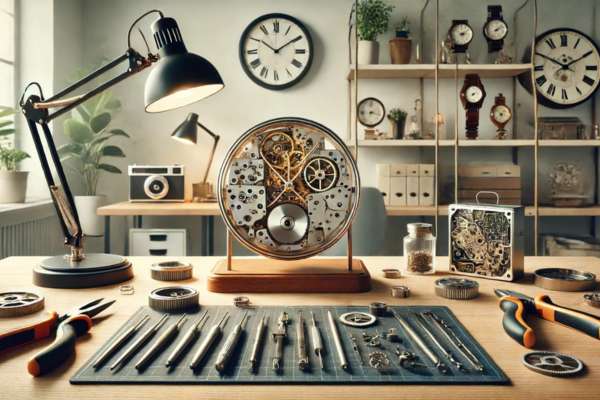
Tools and Materials Needed
Repairing a wall clock requires a few essential tools and materials to ensure a successful fix. First, gather a set of precision screwdrivers to handle small screws and delicate parts. A cleaning solution and soft cloth are necessary for removing dust and grime from the clock’s components. Lubricants, specifically designed for clock mechanisms, help keep the gears running smoothly. You might also need replacement parts like gears, springs, or even a new movement mechanism, depending on the issue. Tweezers and a magnifying glass can assist in handling tiny components with accuracy. Having these tools and materials on hand will make the repair process more efficient and increase the chances of restoring your wall clock to perfect working order.
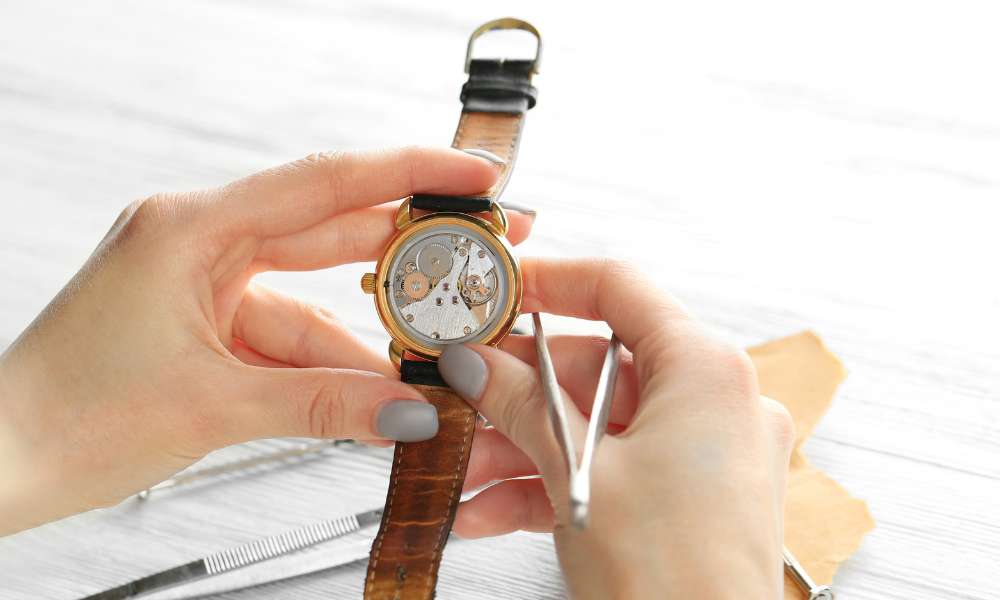
Initial Inspection and Diagnosis
Performing an initial inspection and diagnosis is crucial when figuring out how to repair a wall clock. Start by removing the clock from the wall and placing it on a stable surface. Check the clock hands to ensure they aren’t touching or stuck. Next, open the clock’s back panel to inspect the internal mechanism. Look for any visible damage, loose parts, or dust buildup. Test the movement by gently rotating the gears and observing any irregularities. Determine if the issue is mechanical, such as worn gears, electrical, like faulty wiring, or due to general wear and tear. Identifying the exact problem will guide you in choosing the appropriate repair method, ensuring your wall clock runs smoothly again.
Cleaning the Clock Mechanism
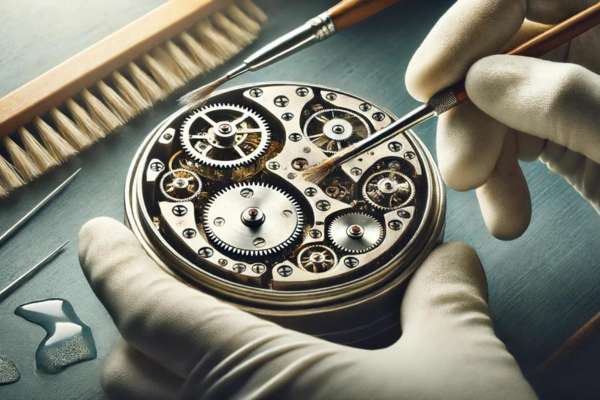
Cleaning the clock mechanism is a crucial step in repairing a wall clock. Begin by carefully removing the clock from the wall and placing it on a clean, flat surface. Using a small screwdriver, gently open the clock case to access the internal components. Use a soft brush or compressed air to remove dust and debris from the gears and movement parts. Avoid using water, as it can damage the mechanism. For stubborn grime, a few drops of rubbing alcohol on a cotton swab can be effective. Gently wipe the components without applying too much pressure. Once clean, reassemble the clock carefully, ensuring all parts are correctly aligned. Regular cleaning can prevent future issues and keep your clock running smoothly.
Repairing or Replacing the Movement
Repairing or replacing the movement mechanism is a crucial step in restoring your wall clock’s functionality. First, carefully remove the clock’s hands and face to access the movement. Inspect the movement for any visible damage or wear. If repair is possible, clean and lubricate the gears and springs. For irreparable damage, sourcing a compatible replacement movement is essential. Measure the old movement’s dimensions and note any model numbers to find a matching part. Many online retailers specialize in clock parts, making it easy to find what you need. Once you have the new movement, install it by following the manufacturer’s instructions, reattach the clock hands, and test for accurate timekeeping. This ensures your wall clock runs smoothly and accurately.
Adjusting and Aligning the Hands
Adjusting and aligning the hands of your wall clock is crucial for accurate timekeeping. Begin by gently removing the clock hands using a small screwdriver to loosen the central nut. Once removed, check for any obstructions or bends in the hands. If bent, carefully straighten them using pliers. Next, reattach the hour hand first, ensuring it is firmly in place, followed by the minute hand, aligning both hands at the 12 o’clock position. Secure them with the central nut, ensuring they are not too tight, which could impede movement. Finally, test the clock by manually moving the hands to confirm they move freely without touching each other or the clock face. This ensures smooth and accurate operation.
Testing and Fine-Tuning

After reassembling your wall clock, it’s time to test its accuracy and fine-tune it for optimal performance. Start by hanging the clock back on the wall in a stable, level position. Set the correct time and observe the clock for a few hours to ensure the hands move smoothly and keep accurate time. Listen for consistent ticking without irregular sounds, indicating proper functioning. If the clock is running fast or slow, use the adjustment mechanism, usually located on the back or side, to fine-tune the timekeeping. Make small adjustments and monitor the clock’s performance over the next 24 hours. By carefully testing and fine-tuning, you can ensure your wall clock runs accurately and reliably.
Conclusion
In conclusion, learning “How to repair a wall clock?” can save you time and money while preserving your cherished timepiece. By understanding the components and diagnosing common issues, you can confidently tackle repairs. Regular maintenance, proper cleaning, and careful adjustments, such as aligning the clock hands, will keep your wall clock running smoothly. Whether it’s a minor adjustment or a significant repair, following these steps ensures your clock remains a reliable part of your home. Embrace the satisfaction of fixing your wall clock and enjoy the accurate timekeeping it provides. With the right knowledge and tools, wall clock repair can be a straightforward and rewarding process.