
Ready to revamp your sleeping space Mastering. How to Paint a Bedroom. can dramatically alter the mood and aesthetics of your room. Painting is more than just a change of color; it’s an opportunity to personalize and enhance your private haven. From selecting the perfect shade that speaks to your style to applying the paint for a professional finish, every step matters. This guide will walk you through the process, offering tips to achieve a smooth, lasting result. Whether you aim for a serene retreat or a vibrant sanctuary, the right paint job can make your bedroom dreams come true.
Planning Your Project

Planning your bedroom painting project starts with gathering the right tools and materials. You’ll need quality paint, rollers, brushes, and painter’s tape to ensure clean lines and professional results. When choosing paint, consider the room’s size, lighting, and function. Lighter colors can make a small bedroom feel larger and more inviting, while darker hues create a cozy, intimate environment. Opt for a paint finish that suits your lifestyle; for example, satin or semi-gloss finishes are ideal for easy cleaning. With the right
Choosing the Right Color
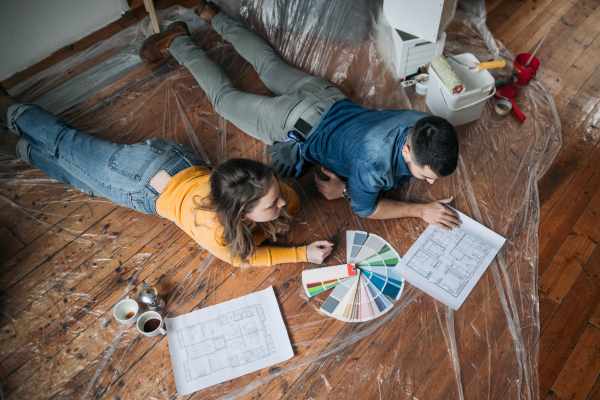
Choosing the right color for your bedroom is crucial in setting the desired mood and complementing the lighting and existing décor. Opt for colors that enhance relaxation and tranquility in a bedroom, like soft blues, gentle grays, or warm earth tones. Consider the natural and artificial lighting in the room as it can significantly alter the appearance of paint under different conditions. Always test paint colors with samples on your walls, observing how they change throughout the day before finalizing your decision. This approach ensures the color you choose perfectly suits your space and style, making your bedroom a comforting personal retreat.
Preparing the Room
Before you dip your brush into the paint, preparing your bedroom is crucial to ensure a clean and efficient painting process. Start by removing or covering all furniture and flooring to shield them from potential paint splatters. Use drop cloths for the floors and plastic sheeting for the furniture. Next, focus on the walls—clean them thoroughly to remove dust and grime for better coloring adherence. Inspect the surface for any holes or imperfections, and apply spackle as needed. Once the spackle dries, sand it down to a smooth finish. This meticulous preparation sets the stage for a flawless paint job.
Taping and Other Preparations
Before you dip your brush into the paint, proper taping is crucial to achieve clean, professional-looking lines in your bedroom makeover. Start by applying painter’s tape along the edges of the trim, ceiling, and any areas you don’t want painted. Press down firmly on the tape to prevent paint from seeping underneath—a key step known as sealing the edges. This meticulous preparation ensures that once the tape is removed, you’re left with sharp, crisp lines that clearly define your beautifully painted walls. Taking the time to tape correctly can make a significant difference in the quality of your final result.
Priming the Walls

Priming your bedroom walls is a crucial step in achieving a flawless paint job. A primer serves as the foundation, ensuring that your chosen color displays uniformly and adheres properly. It’s especially vital when covering dark colors or when transitioning from glossier finishes. Selecting the right primer depends on your wall’s condition and the type of paint you’ll use. For best results, opt for a primer that suits your specific situation—whether it’s a moisture-resistant type for damp rooms or one that blocks stains. Applying primer evenly is key; use a roller for large areas and a brush for corners, ensuring a smooth, consistent coat that will make your final color pop.
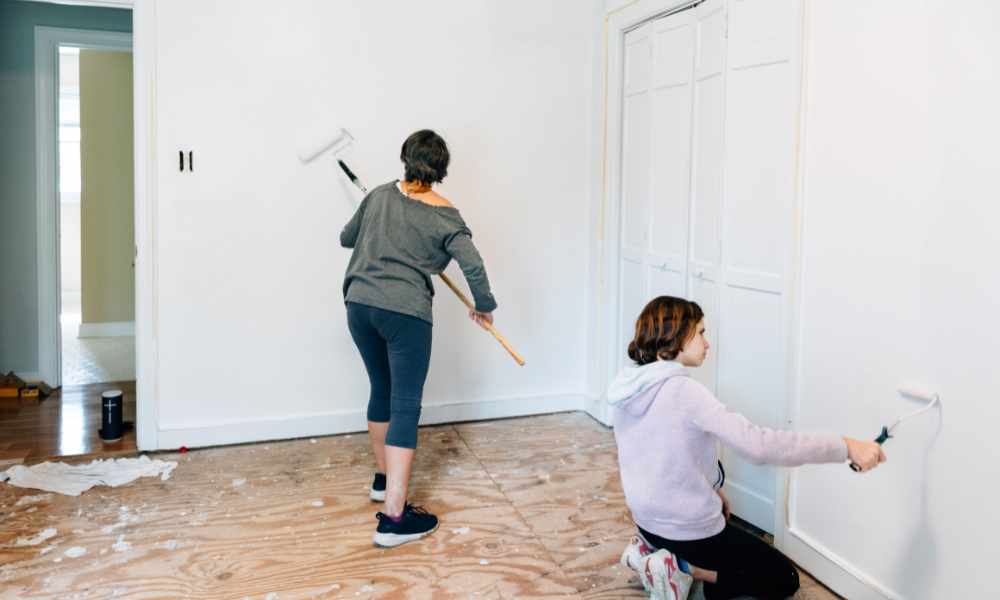
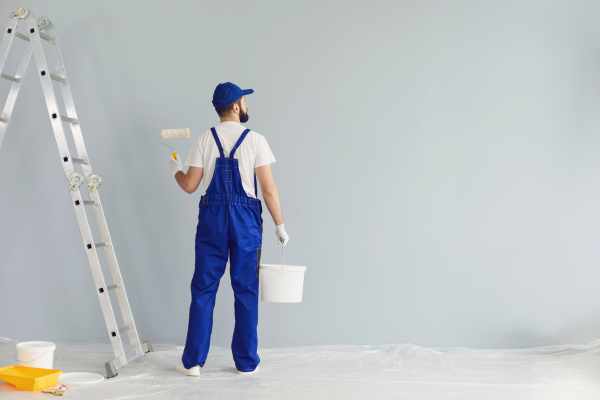
Painting Techniques
Master the art of bedroom painting with effective techniques that ensure a flawless finish. Start by dipping your roller into the paint, rolling it along the tray to ensure even coverage without excess. Apply the paint to the wall using a “W” pattern for optimal distribution. This technique helps spread the coloring uniformly, reducing the chances of missed spots. Continue with smooth, overlapping strokes to blend the edges seamlessly. To avoid common pitfalls like streaks and drips, don’t overload the roller and regularly reload it with paint. With patience and precision, your bedroom walls will look professionally painted, enhancing the overall ambiance of your room.
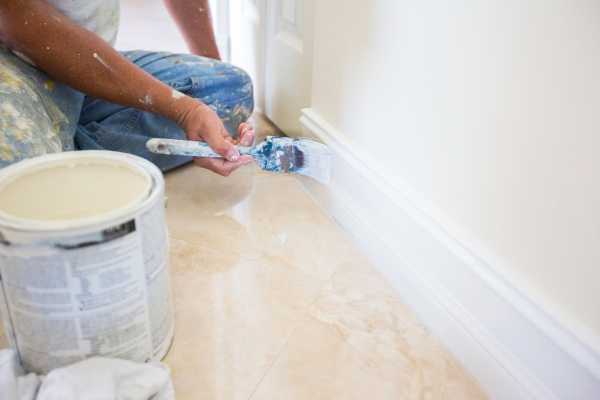
Painting Trim and Detail Work
Proper cleanup and ventilation are crucial steps in painting a bedroom. To maintain your tools, thoroughly clean brushes, rollers, and other equipment with warm soapy water or the appropriate solvent. This ensures they’re ready for future use and prolongs their lifespan. Ventilation is equally important; open windows and use fans to circulate air, helping paint dry faster and reducing fumes. Keeping the room well-ventilated during and after painting protects your health and enhances the paint’s finish. By following these best practices, you’ll achieve a professional result and maintain a safe, fresh environment.
Cleanup and Ventilation

Cleaning up after painting a bedroom is crucial for a professional finish and maintaining your tools. Start by thoroughly washing brushes, rollers, and trays with warm, soapy water. Properly store these items to extend their lifespan. Ensuring adequate ventilation during and after painting is essential to speed up drying time and minimize fumes. Open windows and use fans to promote airflow. If possible, keep the room ventilated for several days. By following these cleanup and ventilation best practices, you’ll ensure a healthier environment and a successful painting project, making your bedroom both beautiful and safe to enjoy.
FAQs on“ How to Paint a Bedroom?”
What type of paint should I use for my bedroom?
For bedrooms, it’s best to use a low-VOC (Volatile Organic Compounds) latex paint. Choose an eggshell or satin finish for walls, as these provide a subtle sheen and are easier to clean than flat finishes. For trim and doors, a semi-gloss finish is durable and easy to maintain.
How many coats of paint are necessary for a bedroom?
Typically, two coats of coloring are recommended for a bedroom. The first coat provides the base color, and the second coat ensures even coverage and a rich, consistent finish. Depending on the color change, a primer may be necessary to cover darker colors or stains effectively.
How can I ensure clean edges and avoid paint bleed?
To achieve clean edges, use high-quality painter’s tape and press it down firmly along the edges where the walls meet the ceiling, trim, or other surfaces. Remove the tape carefully while the coloring is still slightly wet to prevent peeling. For extra protection against coloring bleed, you can seal the tape edges with a thin layer of the base wall color before applying the final paint color.
The Final Touches
Completing your project on “How to Paint a Bedroom” brings a fresh, inviting atmosphere to your space. By following the steps outlined—from choosing the right color and tools to ensuring proper cleanup and ventilation—you can achieve professional results with ease. Painting your bedroom yourself not only saves money but also allows you to personalize your environment. Remember, patience and preparation are key to success. Enjoy the process and take pride in your newly transformed bedroom. Share your results and inspire others to take on their own painting projects with confidence and creativity.